If you’ve noticed unsightly Spider Plant brown tips appearing on your spider plant’s leaves, you’re not alone. This common houseplant issue frustrates many plant parents, especially since spider plants are generally considered easy to care for. Those crisp, brown edges can make even the most beautiful Chlorophytum comosum look unhealthy and stressed.
Brown tips on spider plants matter more than just aesthetics. They often signal underlying care issues that, if left unaddressed, can compromise your plant’s overall health and growth. The good news is that brown tips are usually preventable and manageable once you understand what’s causing them.
In this comprehensive guide, I’ll walk you through the most common causes of brown tips on spider plants, how to identify what’s affecting your specific plant, and practical solutions to restore its health. We’ll also cover prevention strategies to keep your spider plant looking lush and green for years to come.
Quick Overview of Spider Plant (Chlorophytum comosum)
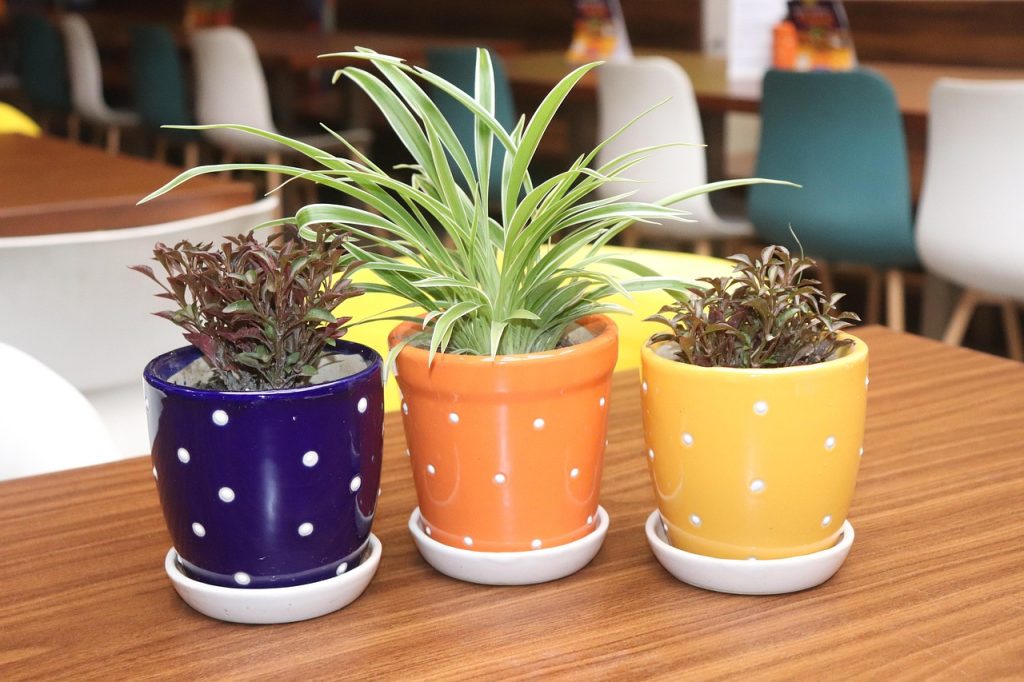
Spider plants originate from South Africa, where they grow as perennial herbs in rocky outcrops and forest margins. In their native environment, these plants enjoy moderate temperatures, filtered light through tree canopies, and seasonal rainfall patterns. This natural habitat gives us important clues about their preferred growing conditions.
Understanding where spider plants come from helps explain why they thrive in bright, indirect light and prefer their soil to dry out slightly between waterings. They’ve evolved to handle some drought but also appreciate consistent moisture during growing seasons.
General Care Needs
Spider plants are relatively forgiving, but they do have specific preferences:
- Light: Bright, indirect sunlight works best. They can tolerate some direct morning sun but struggle with harsh afternoon rays.
- Water: Allow the top inch of soil to dry between waterings. They prefer consistent moisture without being soggy.
- Humidity: Moderate humidity levels of 40-50% keep them happiest, though they adapt to average home conditions.
- Soil: Well-draining potting mix that retains some moisture but doesn’t stay waterlogged.
- Temperature: Comfortable in temperatures between 65-75°F (18-24°C).
Main Causes of Spider Plant Brown Tips
Overwatering ranks as one of the primary culprits behind brown tips. When spider plants sit in constantly wet soil, their roots can’t access oxygen properly, leading to root rot. As the root system deteriorates, the plant struggles to transport nutrients and water to the leaves, resulting in brown, crispy tips.
I’ve seen many well-intentioned plant parents water their spider plants too frequently, thinking they’re being helpful. The roots essentially “drown,” and the plant responds by showing stress signals in its foliage first.
Underwatering & Drought Stress
On the flip side, underwatering causes Spider Plant brown tips when plants become severely dehydrated. Spider plants need consistent moisture to maintain their lush appearance. When they don’t receive adequate water for extended periods, they prioritize survival by shutting down non-essential functions, starting with the leaf tips.
The plant essentially sacrifices the tips to conserve water for more critical areas like the crown and root system.
Low Humidity & Dry Indoor Air
Indoor air, especially during winter months with heating systems running, can become quite dry. Spider plants prefer moderate humidity levels, and when the air becomes too dry, moisture evaporates quickly from the leaf tips, causing them to brown and crisp up.
This issue becomes particularly noticeable in homes with forced-air heating or in naturally dry climates where indoor humidity drops below 30%.
Poor Water Quality
Water quality plays a significant role in spider plant health. Many municipal water sources contain:
- Fluoride: Added to drinking water but can accumulate in plant tissues
- Chlorine: Used for water treatment but can stress sensitive plants
- High salt content: From water softening systems or naturally occurring minerals
These chemicals build up in the soil and plant tissues over time, eventually causing leaf tip burn that appears as brown, crispy edges.

Overfertilization & Fertilizer Burn
Spider plants don’t require heavy feeding, and overfertilization can quickly lead to Spider Plant brown tips. When plants receive too much fertilizer, salt buildup occurs in the soil, making it difficult for roots to absorb water properly. This creates a situation similar to drought stress, even when the soil appears moist.
Fertilizer burn typically shows up as brown edges that may have a yellow halo around them.
Direct Sunlight & Sunburn
While spider plants enjoy bright light, direct sunlight can scorch their leaves. This is especially true for plants that have been growing in lower light conditions and are suddenly moved to a sunny spot. The intense light literally burns the leaf tissues, starting with the delicate tips.
Sunburn often appears as bleached or brown patches rather than just crispy tips, but tip browning frequently accompanies sun damage.
Temperature Extremes & Drafts
Spider plants prefer stable temperatures and can suffer when exposed to:
- Cold drafts from air conditioning units
- Hot air from heating vents
- Sudden temperature changes
- Temperatures below 50°F (10°C) or above 85°F (29°C)
These stressors cause the plant to struggle with normal metabolic processes, often resulting in brown leaf tips as an early warning sign.
Poor Soil Aeration or pH Imbalance
Compacted soil or incorrect pH levels can prevent proper nutrient uptake. Spider plants prefer slightly acidic to neutral soil (pH 6.0-7.0). When the pH is too high or too low, certain nutrients become unavailable to the plant, leading to deficiency symptoms that often manifest as brown tips.
Poor aeration from compacted soil also restricts root function and can contribute to root rot issues.
Root Crowding (Pot-Bound Plants)
Spider plants grow quickly and can become pot-bound within a year or two. When roots fill the entire pot space, they can’t function efficiently, and the plant struggles to absorb adequate water and nutrients. This stress commonly shows up as brown leaf tips.
Pot-bound plants also tend to dry out more quickly, creating additional watering challenges.
Pest or Disease Issues
While less common, certain pests and diseases can cause brown tips:
- Spider mites: These tiny pests suck plant juices, causing stippling and eventual browning
- Thrips: Similar damage to spider mites but with different feeding patterns
- Fungal infections: Can cause various leaf problems including tip browning
- Bacterial issues: May cause brown spots that start at leaf tips
How to Identify the Problem
Understanding the specific appearance of Spider Plant brown tips helps identify the underlying cause:
- Crispy, dry brown tips: Usually indicate watering issues or low humidity
- Soft, mushy brown areas: Often suggest overwatering or fungal problems
- Brown edges with yellow halos: Typically point to fertilizer burn
- Bleached then brown tips: Usually sun damage
- Gradual browning from tip inward: Often water quality or humidity issues
Other Warning Signs
Look beyond just the Spider Plant brown tips for additional clues:
- Yellowing leaves: Can indicate overwatering, underwatering, or nutrient issues
- Wilting despite moist soil: Often suggests root rot
- Musty soil smell: Strong indicator of root rot
- White crust on soil surface: Salt buildup from overfertilization or poor water quality
- Visible pests: Small moving dots, webbing, or sticky honeydew
- Stunted growth: General stress response to various issues
Difference Between Old and New Growth
Pay attention to whether brown tips appear on:
- Older leaves only: Often normal aging process
- New growth: Usually indicates ongoing care issues
- Entire plant: Suggests significant stress factors
New growth showing brown tips is more concerning and requires immediate attention.
Remedies (How to Fix Spider Plant Brown Tips)
Finding the right watering balance is crucial:
- For overwatering: Allow soil to dry more between waterings, ensure proper drainage, and consider repotting if root rot is present
- For underwatering: Increase watering frequency but avoid overcompensating
- Water thoroughly: When you do water, ensure water runs out the drainage holes
- Check soil moisture: Use your finger or a moisture meter to test soil dampness
I recommend establishing a consistent routine where you check soil moisture twice weekly rather than watering on a fixed schedule.
Improve Humidity Levels
Several methods can increase humidity around your spider plant:
- Pebble trays: Place a shallow tray filled with water and pebbles beneath the pot
- Room humidifier: Most effective for multiple plants or entire rooms
- Grouping plants: Plants naturally increase humidity around each other
- Misting: Light misting can help, but avoid over-misting which can encourage fungal issues
Aim for humidity levels between 40-50% for optimal spider plant health.
Use Clean Water & Flush Soil
Water quality improvements make a significant difference:
- Switch to filtered, distilled, or rainwater: Eliminates chlorine, fluoride, and excess minerals
- Let tap water sit 24 hours: Allows chlorine to evaporate
- Flush the soil monthly: Water thoroughly until water runs clear from drainage holes
- Consider water testing: If you suspect water quality issues
Fertilize Properly
Correct fertilization prevents nutrient burn:
- Use diluted fertilizer: Mix to half the recommended strength
- Fertilize only during growing season: Spring through early fall
- Frequency: Every 4-6 weeks during active growth
- Flush soil: If overfertilization is suspected, flush with clean water several times
Provide Appropriate Light
Light adjustments can prevent sun damage:
- Bright, indirect light: Near a window with sheer curtains or a few feet from a sunny window
- Gradual transitions: Move plants slowly to brighter locations over several days
- Rotate regularly: Ensures even growth and prevents one-sided stress
- Monitor for signs: Watch for bleaching or sudden browning after light changes
Maintain Stable Temperature
Temperature control helps prevent stress:
- Avoid drafty locations: Keep away from heating vents, air conditioners, and frequently opened doors
- Maintain consistent temperatures: Between 65-75°F (18-24°C)
- Gradual seasonal adjustments: Allow plants to acclimate slowly to seasonal changes
- Monitor with thermometer: Track temperature fluctuations near your plant
Repot When Necessary
Fresh soil and more space solve several issues:
- Check roots annually: Look for roots growing out drainage holes or circling the pot
- Use fresh, well-draining potting mix: Avoid garden soil or old, compacted potting medium
- Choose appropriate pot size: One size larger than current pot
- Timing: Best done in spring when plant is actively growing
Trim Affected Areas
Proper trimming improves appearance and plant health:
- Use clean, sharp scissors: Sterilize with rubbing alcohol
- Cut just above healthy tissue: Leave a small brown margin to avoid cutting into healthy leaf
- Trim entire leaves if severely damaged: Focus plant energy on healthy growth
- Make clean cuts: Avoid tearing or crushing plant tissues
Address Pests and Diseases
If pests or diseases are present:
- Isolate affected plants: Prevent spread to other houseplants
- Identify the specific problem: Different pests require different treatments
- Use appropriate treatments: Insecticidal soap, neem oil, or systemic treatments as needed
- Monitor closely: Check weekly for signs of improvement or recurring issues
Prevention Tips
Regular Soil Moisture Monitoring
Developing a consistent checking routine prevents both over and underwatering:
- Check twice weekly: More frequently during active growing seasons
- Learn your plant’s patterns: Each plant and pot size has different needs
- Use consistent methods: Finger test or moisture meter for reliable results
- Adjust seasonally: Plants need less water during winter months
Water Quality Management
Investing in good water prevents many common issues:
- Install a water filter: If tap water quality is poor
- Collect rainwater: When possible, for naturally soft water
- Test your water: Understanding your water’s chemical content helps with plant care decisions
- Maintain consistency: Stick with the same water source when possible
Proper Fertilization Schedule
Less is often more with spider plant fertilization:
- Fertilize sparingly: These plants don’t require heavy feeding
- Use balanced, diluted fertilizer: 10-10-10 or similar at half strength
- Skip winter fertilization: Plants are dormant and don’t need extra nutrients
- Watch for signs of overfertilization: Salt buildup, Spider Plant brown tips, or stunted growth
Humidity Maintenance
Consistent humidity prevents many leaf problems:
- Monitor humidity levels: Use a hygrometer to track conditions
- Adjust seasonally: Increase humidity during dry winter months
- Choose appropriate methods: Based on your home’s needs and your plant collection size
- Be consistent: Sudden humidity changes can stress plants
Light Management
Proper light prevents sun damage while promoting healthy growth:
- Observe your plant’s response: Watch for signs of too much or too little light
- Adjust seasonally: Sun angles change throughout the year
- Use window treatments: Sheer curtains can filter harsh sunlight
- Rotate regularly: Ensures even growth and prevents stress on one side
Regular Repotting Schedule
Fresh soil and adequate space prevent many problems:
- Repot every 1-2 years: Even if the plant doesn’t appear root-bound
- Use quality potting mix: Invest in well-draining, appropriate soil
- Monitor root health: Check for signs of rot or pest damage during repotting
- Time it right: Spring repotting allows plants to establish in their new homes
Regular Plant Monitoring
Early detection prevents minor issues from becoming major problems:
- Weekly visual inspections: Look for changes in leaf color, texture, or growth patterns
- Document changes: Photos can help track plant health over time
- Learn normal vs. abnormal: Understanding your plant’s typical appearance helps identify problems early
- Keep records: Note watering dates, fertilization, and any changes in care
FAQs
No, brown tips cannot turn green again. Once plant tissue has died and turned brown, it remains that way. However, you can trim the brown portions with clean scissors, and the plant will continue growing healthy new leaves. Focus on correcting the underlying cause to prevent Spider Plant brown tips on new growth.
It depends on how much of the leaf is affected. If only the tips are brown, trim just the brown portions, leaving a small margin to avoid cutting into healthy tissue. If more than half the leaf is damaged, or if the entire leaf looks unhealthy, remove the whole leaf at the base. This allows the plant to focus energy on producing new, healthy growth.
Recovery time varies depending on the cause and severity of the problem. You should see improvement in new growth within 2-4 weeks after correcting care issues. However, it may take several months for the plant to fully recover and produce a significant amount of new, healthy foliage. Be patient and maintain consistent, proper care during the recovery period.
Spider plants need minimal fertilization. During the growing season (spring through early fall), fertilize every 4-6 weeks with a balanced, diluted fertilizer at half the recommended strength. Skip fertilizing entirely during winter months when the plant is dormant. Over-fertilization is more harmful than under-fertilization for spider plants.
While spider plants can adapt to average home humidity, they do benefit from increased humidity, especially during dry winter months. A humidity tray with water and pebbles can help, but it’s not absolutely necessary. If your home’s humidity stays above 40%, your spider plant should do fine without additional humidity measures. However, if you notice frequent brown tips despite proper watering, low humidity might be the culprit.
Conclusion
Brown tips on spider plants typically result from common care issues like improper watering, low humidity, poor water quality, or environmental stress. The key to healthy spider plants lies in understanding their natural preferences and providing consistent, appropriate care rather than trying to fix problems after they appear.
Most brown tip issues can be resolved by adjusting your watering routine, improving water quality, maintaining adequate humidity, and providing stable growing conditions. Remember that prevention is always easier than treatment, so focus on establishing good care habits from the start.
Take time to observe your spider plant regularly and make gradual adjustments to your care routine based on what you see. With proper attention and care, your spider plant can thrive for years, producing lush green foliage and even baby plantlets to share with friends and family.