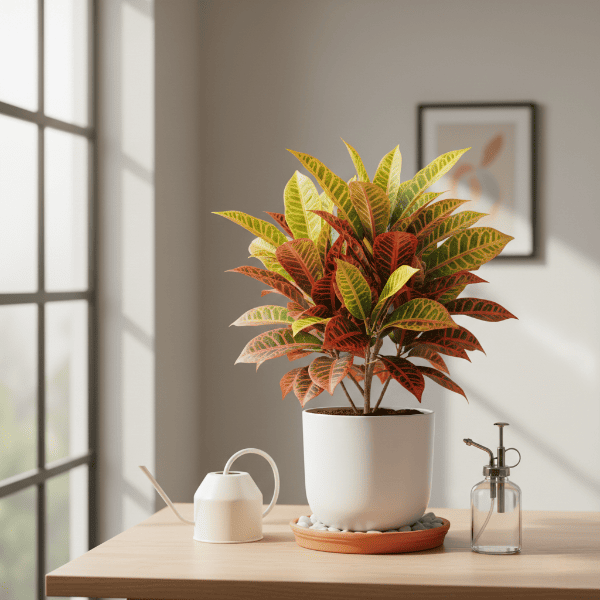
The biggest mistake people make with croton plant care is moving the plant. Every relocation triggers a wave of leaf drop that can strip a full, lush plant almost bare within two weeks. I know this because I did exactly that with my first croton. Brought it home from Lowe’s, loved the look on the dining table, then moved it to the living room shelf, then to a windowsill, then stood there wondering why it looked like a stick with three leaves left. Good croton plant care starts with one commitment: find the right spot and stay there. The rest of it, the watering, the feeding, the humidity, is genuinely manageable once you stop triggering stress responses by relocating the plant every time the mood strikes.
| Aspect | Details |
|---|---|
| Botanical Name | Codiaeum variegatum |
| Common Names | Croton, garden croton, variegated laurel |
| Plant Family | Euphorbiaceae |
| Native Region | Southeast Asia and the Pacific Islands |
| Light | Bright indirect to gentle direct morning sun, 4-6 hours daily |
| Water | When top 1-2 inches (2.5-5 cm) of soil feel dry |
| Humidity | 40-80% |
| Temperature | 60-85 degrees F (15-29 degrees C) |
| Soil | Well-draining potting mix with perlite |
| Mature Size | 3-8 feet tall (90-240 cm) indoors |
| Growth Rate | Moderate |
| Toxicity | Toxic to cats, dogs, and horses (ASPCA) |
| Difficulty Level | Intermediate |
| USDA Zones | 10-12 outdoors |
Why Crotons Drop Leaves – and What the Plant Is Actually Telling You
Start here, because leaf drop is the number one frustration in croton plant care, and understanding it makes every other care decision easier.
Crotons are native to warm, humid, stable environments in Southeast Asia and the Pacific Islands. When you buy one and bring it home, you’re immediately subjecting it to a shift in humidity, light angle, temperature, and air circulation. The plant responds the only way it can: by shedding leaves. This adjustment phase is normal and almost unavoidable, especially in the first two to three weeks after purchase or after any move.
What is not normal is ongoing leaf drop beyond that window. If your croton keeps losing leaves weeks after settling into a spot, the cause is almost always one of four things: insufficient light, cold drafts, inconsistent watering, or a spider mite infestation. We’ll cover each of these in detail below. But the key takeaway right here, before anything else, is that stability is the foundation of strong croton plant care. Pick a good permanent spot based on the requirements in this guide, and half your problems will never start.
Read more: vine plants for indoors
Light: The Most Important Factor in Croton Plant Care
Of everything involved in croton plant care, light has the biggest impact on how the plant actually looks.
Crotons are one of the most light-hungry houseplants available. This is not a shade-tolerant species, and placing it in dim conditions is the fastest way to watch those vivid reds, oranges, and yellows fade into dull green. For the best leaf color, your croton needs a minimum of 4 to 6 hours of bright indirect light every day, and it handles a couple hours of gentle direct morning sun without complaint.
A spot within 3 feet of a south- or east-facing window is ideal for most homes. East-facing windows provide soft direct morning sun that crotons love. Avoid harsh afternoon sun through a west-facing window during summer months, as that level of intensity can scorch the leaf edges.
Here’s what I’ve noticed after growing crotons in two different spots in the same house: the plant near the bright east window had leaves blazing with orange and red. The one placed three feet farther back produced mostly green foliage with a little yellow. Same variety, same soil, same watering schedule. Light made the entire difference.
Pro Tip: If your croton’s new leaves keep coming in mostly green with little color, the plant is asking for more light. Move it gradually closer to a bright window over about a week to reduce adjustment shock.
Croton Plant Care Watering Guide
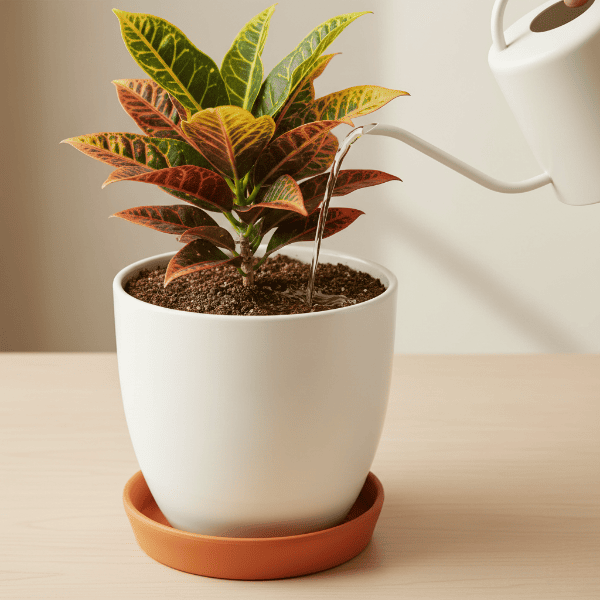
Watering is where a lot of people overthink things. For croton plant care, the watering rule is straightforward: water thoroughly when the top 1 to 2 inches (2.5 to 5 cm) of soil feel dry, and stop when water runs freely from the drainage holes. Then wait until it dries out again before repeating.
Crotons prefer consistently moist soil but will not tolerate soggy roots. Root rot from overwatering is one of the more common problems, especially during the dry winter months when central heating reduces indoor humidity and the plant’s growth slows significantly. Soil that felt dry on the surface last week can still be damp three inches down.
In spring and summer, I water my crotons roughly every 7 to 10 days. Come fall and winter, I extend that to every 12 to 14 days. The actual timing depends on your pot type, your home’s humidity, and the plant’s size, so always use the finger-test rather than a strict calendar schedule.
Worth noting: crotons prefer room-temperature water. Cold water poured directly onto the roots, particularly in winter, can cause sudden temperature shock that triggers leaf drop. Let tap water sit for an hour before using it if your home runs cold.
Soil, Pot Selection, and Drainage
Good croton plant care depends heavily on what the roots are sitting in. Crotons want soil that holds some moisture while draining efficiently enough to prevent waterlogging. A standard peat-based potting mix is a reasonable starting point, but I always amend it. My go-to mix is two-thirds Miracle-Gro Indoor Potting Mix or FoxFarm Ocean Forest, combined with one-third perlite. The perlite keeps the mix airy and prevents the compaction that leads to poor drainage over time.
For pot material, terra cotta is excellent for crotons. The porous walls allow excess moisture to escape, which gives you a helpful buffer if you accidentally overwater. Plastic pots retain moisture longer, which can work in very dry climates but requires more careful watering attention everywhere else.
Always repot in spring, moving up just one pot size (2 inches or 5 cm larger in diameter) at a time. Jumping to a much larger container means excess unused soil stays wet around the roots for too long.
Temperature, Humidity, and the Drama of Placement
Below 55 degrees F (12 degrees C), crotons start suffering. Below 50 degrees F (10 degrees C), they can sustain real damage. Cold is one of the most underestimated factors in croton plant care, partly because the damage does not always show up immediately. A plant sitting near a drafty window in January may look fine for a few days before suddenly dropping a third of its leaves.
Keep your croton in a room that stays between 60 and 85 degrees F (15 to 29 degrees C). Check that it’s not positioned near an air conditioning vent, an exterior door, or a window with poor insulation. These are the most common cold-draft culprits.
For humidity, crotons prefer 40 to 80 percent relative humidity. Most homes in winter run 30 to 50 percent due to central heating. I run a small humidifier during winter near my tropical plant grouping, and the difference in croton health is visible. Grouping your croton with other tropical houseplants also helps, since plants raise the humidity around each other through transpiration. A pebble tray filled with water and placed beneath the pot provides mild humidity benefit with no electricity required, as long as the pot base stays above the waterline.
Pro Tip: During summer, you can move your croton outdoors to a shaded patio for a few months if nighttime temperatures stay above 60 degrees F (15 degrees C). The increase in natural humidity and light intensity often triggers a burst of new colorful growth.
Croton Plant Care Fertilizing Schedule
From spring through early fall, I fertilize my crotons once a month with a balanced liquid fertilizer diluted to half the recommended strength. Jack’s Classic All Purpose 20-20-20 works reliably well. Espoma Organic Indoor Plant Food is a gentler option if you prefer an organic approach.
Croton plant care during winter does not involve fertilizer. Growth slows or stops entirely between October and March, and feeding during this period leads to salt buildup in the soil without the nutrients being absorbed. White crusty residue forming on the soil surface or around the pot rim is a sign of mineral salt accumulation. If that happens, flush the soil thoroughly by running water through the pot for a full minute or two until it runs clear from the drainage holes.
Propagating Croton Plants From Stem Cuttings
Croton propagation is manageable with a little patience. Take a 4- to 6-inch (10 to 15 cm) stem cutting just below a leaf node using clean, sharp scissors. Remove the lower leaves, leaving two or three at the tip.
One important thing to watch out for before you start: crotons produce a milky white latex sap when cut. This sap is a skin and eye irritant. Wear gloves, work in a well-ventilated space, and wash your hands after handling any cut stems.
Dip the cut end in rooting hormone powder, then plant it in a moist mix of equal parts perlite and potting soil. Place a clear plastic bag or humidity dome loosely over the top to hold in moisture, and set it in bright indirect light. Roots typically develop within four to six weeks. Once the cutting shows new leaf growth and resists a gentle tug, it’s ready to be potted up into a standard mix.

Common Pests: Spider Mites and What to Do About Them
Spider mites are the most frequent pest issue you’ll encounter in croton plant care, and they thrive specifically in the dry indoor conditions that winter heating creates.
Look for fine webbing on the undersides of leaves, along with tiny moving dots and a general dusty or stippled appearance to the leaf surface. A severe infestation can cause significant leaf drop on top of the stress damage already visible.
Catch it early and a weekly spray of diluted neem oil or insecticidal soap applied directly to the leaf undersides will clear up the problem within two to three treatments. For heavier infestations, take the plant to a sink or shower and rinse the leaves thoroughly with lukewarm water first, then follow up with neem oil spray. Repeat weekly for three to four weeks to break the mite life cycle.
Read more: How to get rid of spider mites on indoor plants
5 Mistakes That Hurt Croton Plant Care
Most of the problems I see people run into with croton plant care come down to these five errors:
- Relocating the plant repeatedly. Every move risks a new round of leaf drop. Decide on a permanent spot based on the light requirements, test it for drafts, and commit to it.
- Treating it like a low-light plant. Crotons need bright light. Dim conditions fade the leaf colors and stunt growth. No amount of fertilizer or humidity tricks will compensate for inadequate light.
- Watering on a fixed schedule instead of checking the soil. “Every seven days” is a starting estimate, not a rule. Always feel the soil before watering. Seasons, pot size, and indoor temperature all change how quickly the soil dries.
- Misting the leaves for humidity. Misting does almost nothing to meaningfully raise ambient humidity and can leave water spots on the leaves or promote fungal issues. Use a humidifier or pebble tray instead.
- Skipping the gloves during pruning or propagation. The milky latex sap that crotons produce when cut is a genuine skin irritant. It can cause redness and irritation on contact. Gloves are not optional here.
FAQs
Is croton plant care difficult for beginners?
Croton plant care is classified as intermediate difficulty. The plant is not forgiving of environmental instability, cold drafts, or being moved around frequently. That said, once you establish a bright, stable spot with a consistent watering routine, crotons are very manageable and enormously rewarding to grow.
How often should I water a croton plant?
Water when the top 1 to 2 inches (2.5 to 5 cm) of soil are dry, which typically works out to every 7 to 10 days in summer and every 12 to 14 days in winter. Always check the soil with your finger rather than following a fixed calendar schedule, since drying time varies by season, humidity, and pot material.
Why are my croton’s leaves turning green and losing color?
Color loss almost always points to insufficient light. Crotons (Codiaeum variegatum) need bright indirect light for at least 4 to 6 hours daily to produce vivid red, orange, and yellow pigmentation. Move the plant gradually closer to a bright south- or east-facing window and watch for more vibrant new growth within a few weeks.
Is the croton plant toxic to cats and dogs?
Yes. According to the ASPCA, croton is toxic to cats, dogs, and horses. The milky latex sap is also a skin and eye irritant for humans. Keep the plant out of reach of pets and children, and wear gloves when pruning or propagating.
What are the most important conditions for croton plant care?
The three non-negotiables in croton plant care are bright light, stable placement, and consistent watering. Get those three things right and the plant will perform well. Humidity support during dry winter months is the next most valuable addition if those basics are already covered.
How big do croton plants get indoors?
Indoors, a croton typically reaches 3 to 4 feet tall (90 to 120 cm) under normal conditions. In very bright spots with regular fertilizing, some varieties can grow up to 6 feet (180 cm) tall. Outdoors in USDA hardiness zones 10 to 12, crotons can reach 8 feet (240 cm) and grow into substantial shrubs.
Why does my croton keep dropping leaves even after weeks at home?
If leaf drop continues beyond two to three weeks, check for the four most common causes: inadequate light, a cold draft from a nearby vent or window, inconsistent watering cycles, or a spider mite infestation. Check the undersides of remaining leaves for fine webbing. Addressing whichever of these applies usually resolves the ongoing drop within a few weeks.
Can I put my croton outside in summer?
Yes, as long as nighttime temperatures stay reliably above 60 degrees F (15 degrees C). Move it to a shaded outdoor spot first, then gradually introduce it to more light over a week to prevent leaf scorch. Bring it back inside before nighttime temperatures drop in early fall, and expect some leaf drop when it transitions back indoors.
Croton plant care rewards patience and consistency more than any special tricks or products. Bright light, stable placement, and watering based on soil feel rather than a calendar are the three pillars everything else rests. This plant will tell you when something is wrong, usually by dropping leaves, but it bounces back faster than most people expect when conditions are corrected. I’ve had crotons stripped nearly bare from a cold draft that came back full and vibrant within two months once the problem was fixed. Trust the process, stay consistent, and proper croton plant care will deliver some of the boldest, most vivid foliage of any plant in your collection.
Happy planting!