
The first time I saw a healthy, well-established patch of creeping phlox in full spring bloom, I genuinely stopped walking and just stood there for a moment. It was a neighbor’s front slope, and the entire hillside was covered in a dense, unbroken carpet of lavender-pink flowers so vivid and so complete that the foliage underneath was completely invisible. I had never seen a ground cover do that before. Most plants you see used as slope covers look sparse and intentional, like they are trying and not quite succeeding. Creeping phlox succeeds completely and dramatically.
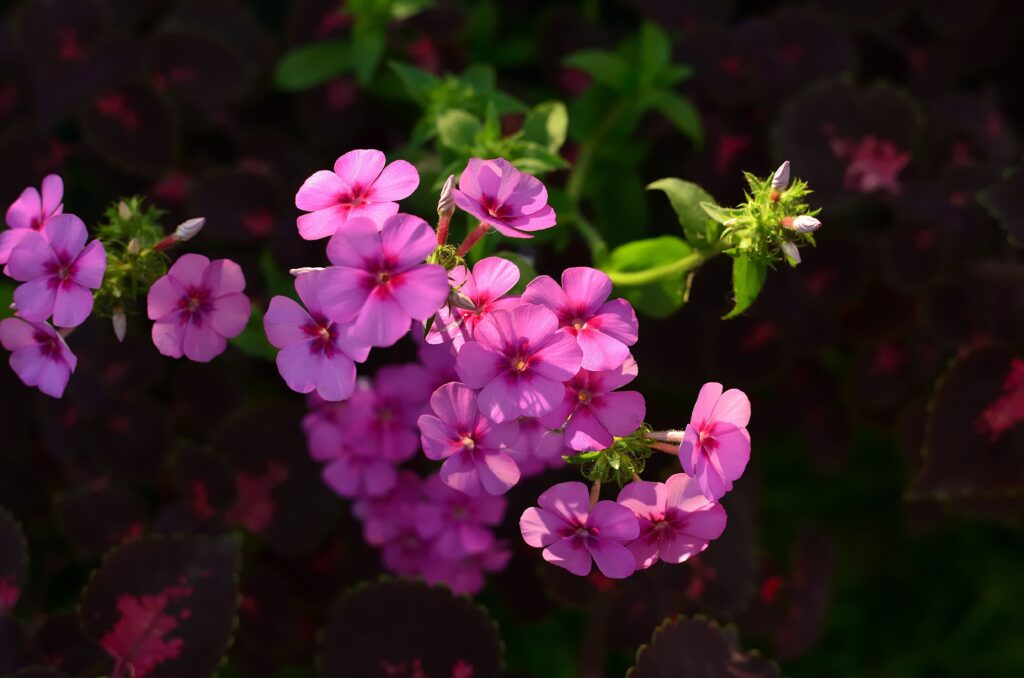
I went home, looked it up, ordered three plants from a local nursery, and have been growing creeping phlox in three different spots in my garden every since. This guide is everything I wish someone had told me before I started, from planting timing to pruning after bloom to the varieties that perform best in different garden conditions.
| Aspect | Details |
|---|---|
| Botanical Name | Phlox subulata |
| Common Names | Creeping phlox, moss phlox, moss pink, mountain phlox, thrift |
| Plant Family | Polemoniaceae |
| Native Region | Eastern North America (Appalachian Mountains, central US) |
| Plant Type | Perennial, semi-evergreen ground cover |
| Bloom Time | Mid-March to May (spring) |
| Flower Colors | Pink, lavender, purple, white, red, bi-color |
| Light | Full sun to light shade, 6-8 hours daily |
| Water | Regular until established; drought tolerant after |
| Soil | Well-draining, slightly alkaline to neutral (pH 6.0-8.0) |
| Height | 4-6 inches (10-15 cm) |
| Spread | 18-24 inches (45-61 cm) per plant |
| Growth Rate | Moderate |
| USDA Zones | 3-9 |
| Toxicity | Non-toxic to cats, dogs, and humans |
| Difficulty Level | Beginner |
| Deer Resistant | Yes |
What Is Creeping Phlox and Why Every Gardener Should Know It
Creeping phlox is a low-growing, semi-evergreen perennial native to the eastern United States, particularly the rocky slopes and open woodlands of the Appalachian Mountains and surrounding regions. It belongs to the Polemoniaceae family and is classified as Phlox subulata, a name that refers to the needle-like, awl-shaped foliage that gives the plant its other common name, moss phlox. Unlike tall garden phlox varieties that grow to several feet in height, creeping phlox stays close to the ground, reaching only 4 to 6 inches (10 to 15 cm) tall while spreading horizontally up to 2 feet (61 cm) or more per plant over time.
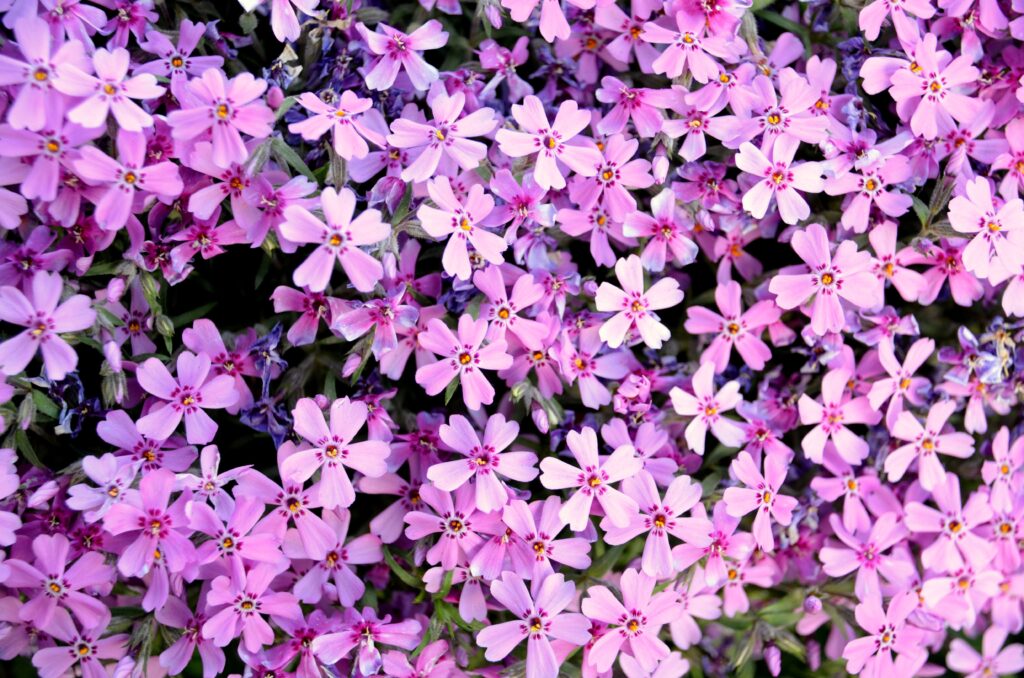
This growth habit makes creeping phlox one of the most versatile and genuinely beautiful ground covers available to home gardeners at any experience level. During its brief but spectacular bloom period in mid-spring, creeping phlox produces such a dense cover of small, five-petaled flowers that the foliage underneath becomes completely invisible, creating the solid carpet effect that stops people in their tracks when they see a mature planting for the first time.
Once blooming is finished, the needle-like foliage remains attractive and semi-evergreen through winter, giving the garden structure and texture during the months when most other perennials have died back completely. For a broader look at ground-covering plants and low-maintenance outdoor options, our article on drought tolerant plants covers some of the best companion choices for slopes and problem areas.
Creeping Phlox Growing Requirements at a Glance
Light Needs
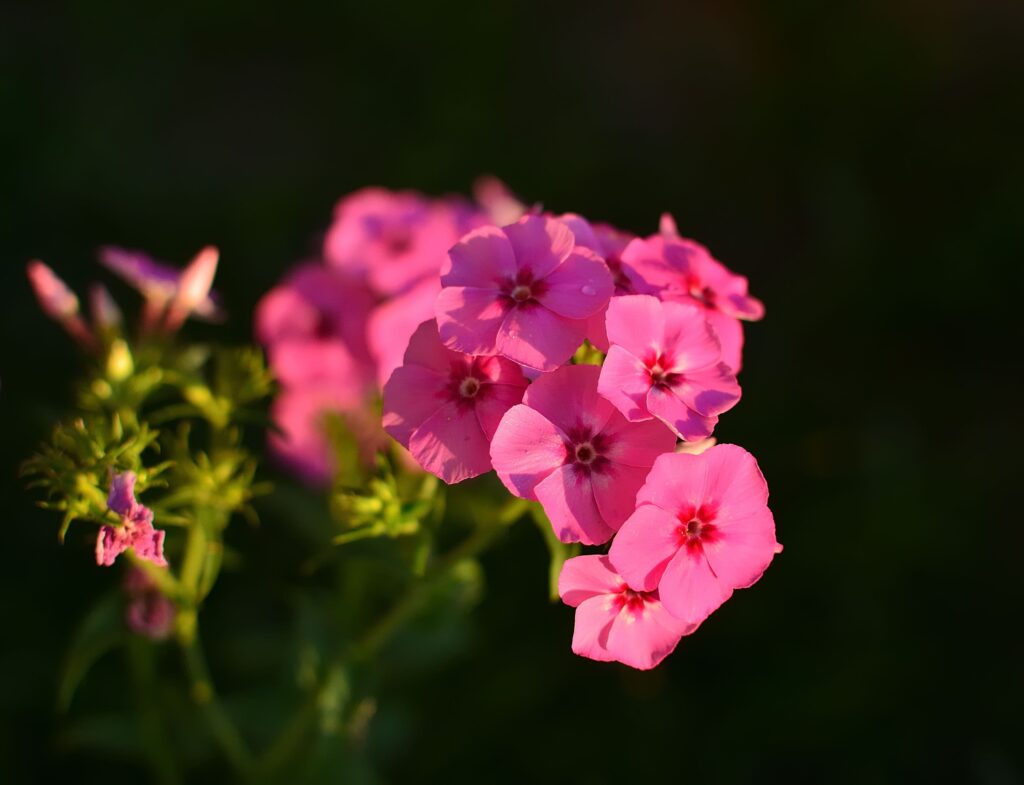
Creeping phlox performs best in full sun, which means at least 6 to 8 hours of direct sunlight per day. When planted in optimal light conditions, a mature creeping phlox plant produces the densest possible flower coverage during spring blooming. It maintains its compact, tidy growth habit throughout the rest of the year. In hot summer climates across the southern US, a spot that receives some afternoon shade, particularly from 2 PM onward, helps the plant avoid heat stress during the summer months without significantly reducing flowering performance the following spring. However, creeping phlox planted in heavy shade or under a dense tree canopy will not flower reliably and tends to develop an open, leggy growth habit rather than the tight, dense mat that makes this plant so visually impactful.
If you have a spot that receives morning sun only, creeping phlox will still grow and produce flowers, but the bloom density will be noticeably less impressive than plants in full sun positions. Choosing the right location from the start matters more for this plant than for many other perennials, because creeping phlox develops an extensive root system that makes transplanting established specimens difficult and stressful without losing a season of growth.
Soil Requirements
Creeping phlox is remarkably adaptable when it comes to soil type, and it is one of the few flowering perennials that genuinely performs well in poor, rocky, or sandy soils as long as drainage is excellent. The one condition creeping phlox cannot tolerate is heavy, waterlogged soil. Rich clay soils that retain moisture around the roots through winter almost always lead to crown rot, which kills the plant at the soil line during the colder months when it is most vulnerable. The ideal soil for creeping phlox is loose, gritty, well-draining, and slightly alkaline to neutral, with a pH between 6.0 and 8.0. Rocky hillsides, slopes with sandy or gravelly soil, and raised rock garden beds all suit this plant perfectly because they drain freely after rainfall and warm up quickly in spring, which encourages early bloom production.
If you are planting creeping phlox into average garden soil with reasonable drainage, adding a couple of inches of coarse sand or fine gravel to the planting area and working it into the top 6 to 8 inches (15 to 20 cm) of soil improves drainage noticeably. Heavy clay soils require more significant amendment or raised planting to give creeping phlox the drainage conditions it needs to thrive long-term. For a full breakdown of soil types and how to amend them for different plant needs, our guide on best soil for indoor plants covers the principles of drainage and soil structure that apply to container planting as well as garden beds.
How to Plant Creeping Phlox Correctly
Timing and technique both matter when establishing creeping phlox, and getting these right from the start significantly affects how quickly the plant settles in and begins spreading.
When to Plant
The two best planting windows for creeping phlox are early spring and fall. Fall planting, specifically September through October in most US regions, consistently produces the best results because it gives creeping phlox an extended period of mild temperatures to develop a strong root system before the ground freezes. Plants established in fall typically bloom with noticeably more vigor in their first spring than plants put in the ground during spring.
Spring planting works well too, and most gardeners plant creeping phlox in spring simply because that is when nurseries stock it and when it is most visible in bloom. Plant as early as the ground can be worked in your region, which gives the roots several weeks to establish before summer heat arrives. Avoid planting during the heat of summer, as newly planted creeping phlox has shallow roots and cannot tolerate the combination of heat stress and water stress that high temperatures bring.
Step-by-Step Planting Guide
Planting creeping phlox correctly takes about ten minutes per plant and sets the foundation for years of reliable performance:
- Choose your location carefully. Confirm the spot receives at least 6 hours of direct sun daily and that the soil drains freely within an hour of rainfall. A gentle slope is ideal.
- Prepare the planting area. Loosen the soil to 6 to 8 inches (15 to 20 cm) deep. Remove any weeds or grass competing for space. Mix in coarse sand or grit if the soil is heavy.
- Dig the planting hole. Make the hole about twice as wide as the root ball but only as deep as the nursery pot. Creeping phlox performs best when the crown is planted at the same depth it was growing in its container, never buried deeper.
- Space plants correctly. Set creeping phlox plants 12 to 18 inches (30 to 45 cm) apart center to center. They will fill in the spaces within two to three growing seasons. Planting closer speeds coverage but increases cost.
- Water immediately after planting. Water thoroughly and deeply right after planting to settle soil around the roots. During the first growing season, water regularly enough that the soil never dries completely at root depth.
Watering Your Creeping Phlox Through the Seasons
Consistent moisture management through the first growing season is the single most important care task for newly planted creeping phlox, and this is where most beginners lose plants without understanding why. A newly planted creeping phlox has a limited root system that cannot access deep soil moisture the way an established plant can, so it depends entirely on you for water during periods without rain. Water new plants once or twice per week during the first growing season, more frequently during hot spells, and check that the soil at root depth feels consistently moist rather than either soggy or bone dry.
Established creeping phlox, meaning plants in their second year and beyond, is a different story entirely. Mature creeping phlox is genuinely drought-tolerant once its extensive root system has developed, and it can go one to two weeks without supplemental watering in all but the most extreme summer heat. The worst thing you can do with an established creeping phlox is water too frequently or too shallowly, because this encourages surface rooting rather than deep root development, making the plant more, not less, vulnerable to drought.
Water deeply and infrequently once the plant is established, allowing the top 2 inches (5 cm) of soil to dry between waterings during the growing season. In winter, do not water unless the ground is completely dry and unfrozen, as creeping phlox enters a semi-dormant phase that requires very little moisture. For more guidance on reading plant stress signs and adjusting your watering routine, our guide on overwatering vs underwatering covers the visual symptoms that tell you which direction the plant is struggling.
Fertilizing Creeping Phlox for Best Bloom Performance
Creeping phlox is not a heavy feeder, and over-fertilizing is one of the quickest ways to encourage lush, soft foliage growth at the expense of flowering. The best approach is a single, well-timed application of a balanced or slightly phosphorus-heavy fertilizer in late winter or very early spring, just as the ground begins to warm and before new foliage growth begins. A granular slow-release fertilizer like Osmocote Plus 15-9-12 sprinkled lightly around the base of each creeping phlox plant works well for this purpose.
Liquid fertilizers like Jack’s Classic Blossom Booster 10-30-20 can also be applied at half strength in early spring to encourage strong bloom production without pushing excessive leafy growth. The phosphorus in both of these formulations specifically supports flower bud formation, which is what you want to maximize the spring bloom display that makes creeping phlox such a memorable garden plant. After the spring bloom period is finished, creeping phlox does not need further fertilizing through summer and fall.
Feeding during those periods pushes vigorous vegetative growth rather than directing the plant’s energy toward next year’s bloom production. If you notice that creeping phlox plants are producing noticeably smaller flowers or less dense bloom coverage than in previous years, it is often a sign that the soil has become depleted of phosphorus and potassium, and a fresh slow-release application in early spring will restore performance within a season.
Pruning Creeping Phlox: The Critical Post-Bloom Task
Pruning is the one care task that makes the biggest difference to creeping phlox health and bloom performance over time, and it is the task most beginners skip or do incorrectly. After the spring flowers fade, which happens sometime between late April and June depending on your location and the specific year’s weather, cut back the entire plant by about one-third to one-half of its length using clean, sharp garden shears or hedge trimmers. This post-bloom pruning accomplishes three important things simultaneously.
First, it removes the spent flower stems and encourages the plant to put energy into producing fresh, compact new growth rather than setting seed. Second, it prevents the plant from becoming woody and open in the center, which happens naturally over time without regular pruning and causes the plant to lose the dense mat-forming habit that makes creeping phlox visually impressive. Third, in some cases and climates, hard pruning after blooming triggers a partial second flush of flowers in late summer or early fall, though this is not guaranteed and should be considered a bonus rather than an expectation.
A second optional pruning in late winter, cutting the plant back by about one-quarter just before new spring growth begins, encourages the vigorous new growth that produces the most prolific flower display. Never cut creeping phlox back so severely that you remove all foliage, as the semi-evergreen leaves are what sustain the plant’s root system through winter.
Creeping Phlox Varieties Worth Growing
The variety you choose affects flower color, bloom timing, fragrance, and how well the plant adapts to your specific climate. These are the most reliable and widely available options:
| Variety | Flower Color | Fragrance | Notes |
|---|---|---|---|
| ‘Emerald Blue’ | Lavender-blue | Mild | Most popular variety; vigorous spreader |
| ‘Emerald Pink’ | Bright pink | Mild | Dense, fast-spreading; extremely floriferous |
| ‘White Delight’ | Pure white | Mild | Clean, bright; excellent contrast plant |
| ‘Scarlet Flame’ | Deep reddish-pink | Mild-moderate | Most saturated color; fills quickly |
| ‘Amazing Grace’ | White with pink eye | None | Striking bi-color; excellent in containers |
| ‘Fort Hill’ | Hot pink | Moderate | Very dense bloomer; great for slopes |
| ‘Candy Stripe’ | Pink and white | Mild | Bi-color striped petals; eye-catching detail |
| ‘Purple Beauty’ | Deep purple | None | Richest color; slower to spread |
The Emerald series, particularly ‘Emerald Blue’ and ‘Emerald Pink’, are the two varieties I consistently recommend to beginners because of their vigorous spreading habit, reliable bloom density, and wide availability at garden centers including Home Depot, Lowe’s, and online through Burpee or American Meadows. If you want to create a mixed planting of creeping phlox in multiple colors, plant different varieties at least 18 to 24 inches (45 to 60 cm) apart to give each room to spread before they begin to mingle along their edges.
Creative Ways to Use Creeping Phlox in Your Landscape
Creeping phlox is versatile enough to serve multiple landscape functions at once, which makes it worth thinking about strategically rather than just picking a random spot. As an erosion-control plant on slopes and banks, creeping phlox is genuinely effective once established. Its spreading root system knits together to stabilize loose or sandy soils, and the dense mat of foliage blocks weed seed germination effectively enough that a well-established planting of creeping phlox requires almost no weeding after the first two years.
Along stone pathways and between stepping stones, creeping phlox softens hard edges beautifully and releases a light fragrance when brushed or walked near during the bloom period. In rock gardens, creeping phlox is a classic companion to spring bulbs like tulips and daffodils, providing the colorful ground-level carpet that makes the bulbs look intentionally designed rather than randomly placed. In mixed perennial borders, plant creeping phlox along the front edge where it can spill slightly forward onto a pathway or lawn edge without competing with taller plants behind it.
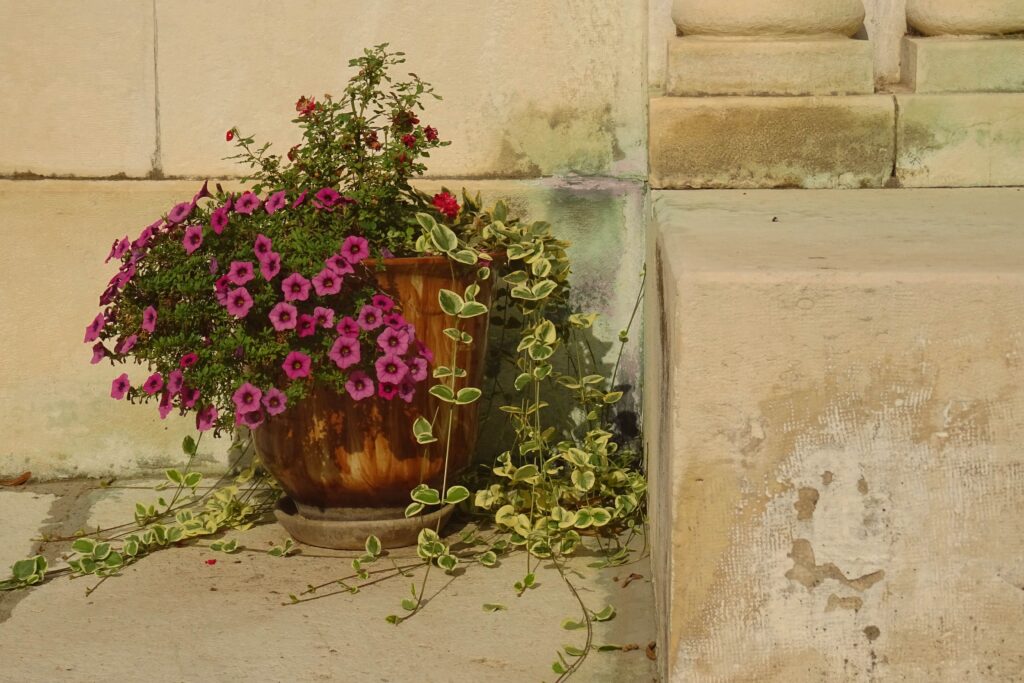
Container growing works surprisingly well for creeping phlox, particularly in window boxes and larger hanging baskets where the trailing stems create a cascading effect during bloom season. For pot selection guidance and which container materials work best for outdoor perennials, our guide on best planters for indoor plants covers the drainage and sizing principles that apply equally well to outdoor container gardening.
Common Creeping Phlox Problems and How to Fix Them
Powdery mildew is the most common disease problem with creeping phlox, and it almost always develops in response to the same conditions: high humidity, poor air circulation, and foliage that stays wet for extended periods. It shows up as a white, dusty coating on the leaf surfaces and can spread quickly through a dense planting. The most effective prevention is to water at the base of the plant rather than from above, prune annually to maintain good air circulation through the planting, and thin overcrowded sections if plants have merged into a very dense mass. Treat existing mildew with a diluted neem oil spray or a copper-based fungicide applied in the evening when temperatures are cooler.
Root and crown rot develops in soils that retain too much moisture around the base of the plant, particularly during winter dormancy when cold, wet soil conditions are most damaging. Plants affected by crown rot show wilting or browning from the center outward, and the crown tissue at soil level feels soft and discolored rather than firm when pressed. Prevention is the only real solution, as established crown rot is very difficult to reverse. Always plant creeping phlox in well-draining soil or raised beds, avoid mulching directly against the plant’s crown, and do not overwater during cool or wet periods. Our guide on root rot treatment covers the diagnostic steps and recovery options for plants showing early-stage root damage.
Spider mites are the most common pest on creeping phlox, particularly during hot, dry summer conditions when the plant is not actively growing and pest monitoring often slips. They appear as fine stippling or yellowing on the leaf surface, sometimes with fine webbing visible between stems. A strong jet of water applied to the undersides of leaves removes most infestations immediately, and insecticidal soap from Home Depot or Lowe’s handles persistent cases within two to three treatments applied weekly.
Yellowing foliage during the growing season that is not caused by pests typically points to one of three things: overwatering and poor drainage creating soggy root conditions, iron deficiency in alkaline soils where pH has drifted above 7.5, or natural die-back of the oldest inner stems as the plant ages. Check soil drainage first. If drainage is fine, test the soil pH and adjust with sulfur applications if needed. If the yellowing is concentrated in the center of older plants, the cause is likely natural aging and a hard post-bloom pruning will resolve it. Our guide on plant leaves turning yellow covers the visual diagnostic patterns that distinguish these causes clearly.
No blooms or very sparse flowering after an established creeping phlox plant has performed well in previous years is almost always caused by one of two things: too much shade from a tree or shrub that has grown taller and now blocks the light that was present when the plant was established, or excessive soil nitrogen from fertilizer or organic matter that pushes vegetative growth at the expense of flowering. Assess the light conditions honestly before adding any fertilizer, and consider whether nearby trees or structures have changed the sun exposure in that bed over the past few seasons.
Propagating Creeping Phlox
Growing more creeping phlox from your existing plants costs nothing and is genuinely rewarding. Three methods work reliably.
Stem cuttings taken in early summer from the new growth that follows the spring bloom are the fastest and most reliable propagation method. Cut 3 to 4 inch (7.5 to 10 cm) sections of non-flowering stems just below a leaf node, strip the lower leaves, and insert the cuttings into a moist mix of perlite and potting mix. Keep them in indirect light with consistent humidity for three to four weeks until roots develop, then pot them individually before planting out in fall.
Division is best done in early spring before new growth begins or in early fall after the summer heat passes. Use a sharp spade to cut through the outer edge of an established creeping phlox mound, lift the section, and replant it immediately in the new location. The divisions establish quickly if planted when conditions are cool and moist.
Layering happens naturally with creeping phlox as stems in contact with soil develop roots on their own over time. These naturally rooted sections can be cut from the parent plant and transplanted to new locations with minimal disturbance to the root system, making it the lowest-stress propagation method of the three.
Creeping Phlox in Winter: What to Expect and What to Do
Creeping phlox is considered semi-evergreen, which means it retains most of its needle-like foliage through winter in all but the coldest parts of its range. In USDA zones 3 and 4, the foliage may brown slightly or die back partially during the most severe cold, but the plant survives and regrows from the crown in spring without any winter protection needed. In zones 5 through 9, creeping phlox remains green and attractive through the entire winter season, providing visual interest in garden beds and on slopes when everything else has gone dormant.
No special winter care is required beyond ensuring the plant is not sitting in waterlogged soil during freeze-thaw cycles, which is the primary cause of winter death in creeping phlox that would otherwise survive the cold temperatures without difficulty. If the winter in your area has been unusually dry, a single deep watering in late November before the ground freezes gives the roots adequate moisture reserves to carry the plant through a cold, dry winter. For guidance on protecting plants during extreme cold and frost events, our guide on how to protect your garden from frost covers the most practical approaches for perennials that need minimal but specific cold-weather care.
Mistakes to Avoid With Creeping Phlox
- Planting in shade because the location is convenient. Creeping phlox in deep shade produces sparse foliage and no meaningful bloom display. Light is non-negotiable for this plant. If the best-looking spot in your yard is shaded, creeping phlox is not the right plant for it.
- Skipping the post-bloom pruning. Every year you skip pruning after the spring flowers fade, the plant becomes woodier in the center, spreads more unevenly, and produces a slightly less impressive bloom display the following spring. The pruning takes five minutes per plant and makes a visible difference.
- Overwatering established plants. After the first growing season, creeping phlox is drought tolerant and resents consistently wet soil. Treating it like a thirsty annual and watering it frequently through summer is one of the main causes of root and crown rot in established plants.
- Planting in poorly draining clay soil without amendment. This is the most common reason creeping phlox dies in otherwise suitable climates. Amend the soil before planting or choose a naturally well-draining spot.
- Planting too close together expecting faster coverage. Overcrowded creeping phlox plants compete for light and water, develop poor air circulation that invites disease, and actually spread more slowly than plants given adequate space. Follow the 12 to 18 inch (30 to 45 cm) spacing guidelines and trust the plants to fill in on their own schedule.
FAQ
When does creeping phlox bloom and how long does it flower?
Creeping phlox blooms in spring, typically from mid-March through May depending on your USDA zone and the specific weather of a given year. In zones 7 through 9 in the southern US, creeping phlox may begin blooming as early as late February or early March. In cooler zones 3 and 4, it may not peak until mid-May. The bloom period for any individual planting typically lasts four to six weeks. In some climates, cutting back the plant hard immediately after the main bloom can trigger a smaller second flush of flowers in late summer or early fall.
Is creeping phlox invasive?
Creeping phlox is not classified as invasive in any US state, though it does spread steadily through horizontal stem growth rather than self-seeding aggressively. It is native to eastern North America, which means it exists within the ecological context of its growing region rather than outside it. In mixed borders, creeping phlox can overtake smaller, less vigorous neighboring plants if not divided every three to four years or kept within defined edges. For large slopes and areas where coverage rather than containment is the goal, its spreading habit is an asset rather than a concern.
Does creeping phlox come back every year?
Yes. Creeping phlox is a perennial plant that returns every spring for decades when established in appropriate conditions. It is cold-hardy in USDA zones 3 through 9, which covers most of the continental United States. Once established, a single creeping phlox plant can live for twenty years or more with minimal care beyond annual pruning. This makes it an exceptional long-term value compared to annual ground covers that must be replanted each year.
Can creeping phlox grow in containers?
Yes, and it performs quite well in larger containers, window boxes, and hanging baskets where the trailing stems create a cascading effect during the bloom period. Choose a container at least 12 inches (30 cm) wide with drainage holes, use a well-draining potting mix amended with perlite, and be prepared to water more frequently than you would with in-ground creeping phlox since containers dry out faster. Container-grown creeping phlox may need to be overwintered in a protected location in colder zones to prevent the root ball from freezing solid.
Does creeping phlox spread on its own?
Yes, creeping phlox spreads through horizontal stem growth, with each stem capable of rooting where it contacts soil. A single plant can spread 18 to 24 inches (45 to 60 cm) in its first season and continue expanding slowly each year after that. A planting of three to five creeping phlox plants spaced 18 inches (45 cm) apart will fill a 4 to 6 foot (120 to 180 cm) area within two to three growing seasons without any intervention needed.
How do I get creeping phlox to bloom better?
The most effective steps for improving creeping phlox bloom performance are: confirm the plant receives at least 6 hours of direct sun daily, prune it by one-third immediately after each spring bloom to prevent it from becoming woody, apply a balanced or phosphorus-heavy fertilizer in late winter or very early spring, and ensure the soil drains freely so the root system stays healthy through the off-season. A healthy, well-pruned creeping phlox in good light will reliably produce dense bloom coverage year after year without requiring complex care.
Is creeping phlox safe for pets?
Yes. Creeping phlox is non-toxic to cats, dogs, and horses according to the ASPCA. It does not produce irritating sap, and the needle-like leaves are not a hazard to most animals even if chewed. This makes creeping phlox a safe choice for gardens shared with pets, which combined with its deer resistance and tolerance for slopes and poor soils makes it one of the most genuinely trouble-free plants a pet-owning gardener can choose for covering difficult ground.
Creeping phlox rewards gardeners who give it the right conditions from the start with something very few plants can match: a spring display so complete, so colorful, and so low-maintenance that it looks like far more work than it actually is. A well-established planting of creeping phlox on a slope or along a garden edge requires perhaps thirty minutes of care per year, which is mostly the post-bloom pruning, and produces weeks of spring color that improves every year as the plant matures and spreads. If you have never grown creeping phlox before, this is the spring to start. Plant it this fall for the best results, and by the following April you will understand exactly why that neighbor’s hillside stopped me in my tracks.
Happy planting!